Hello! I found out something today about U-shaped stairs, and I thought I'd share it with everyone.
I was test-building U-shaped stairs and L-shaped stairs according to the Build and Edit guide from Carl's The Sims 3 Guide (
http://www.carls-sims-3-guide.com/buildedit/houses/multilevel/stairs.php), and I really wanted a U-shaped staircase against the wall, so I decided to combine and play around with both concepts.
Here's my final result:
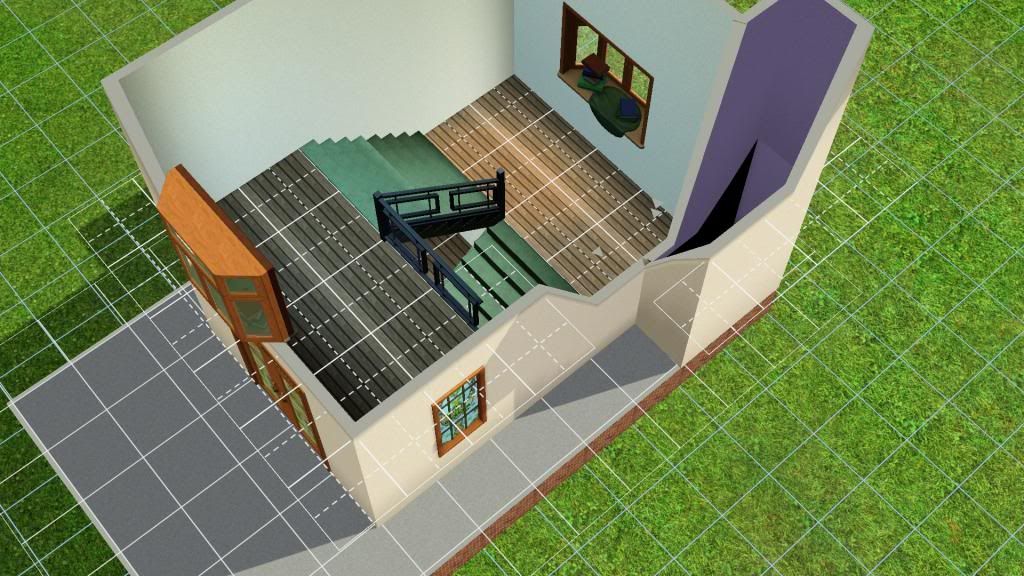
What I did:
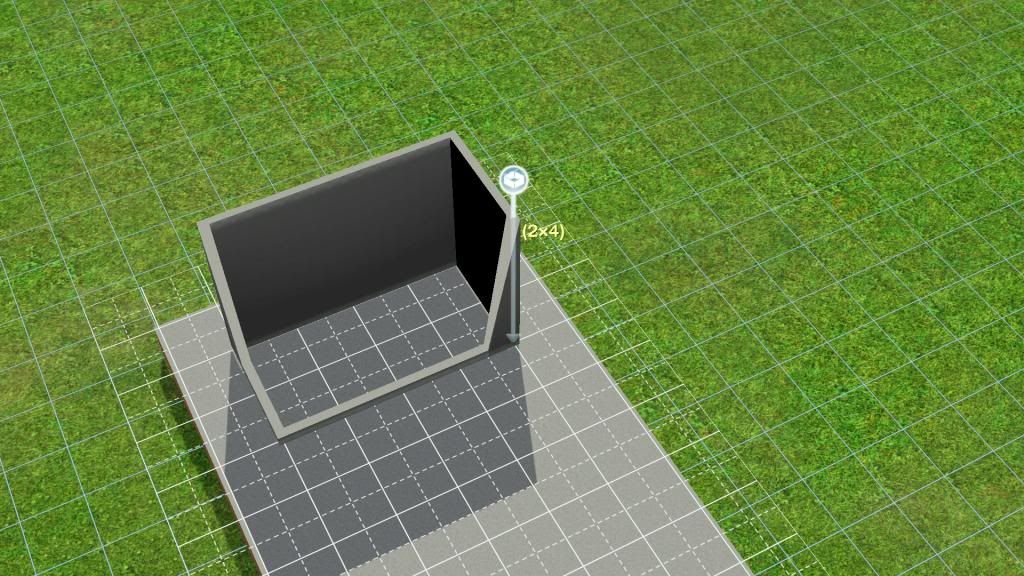
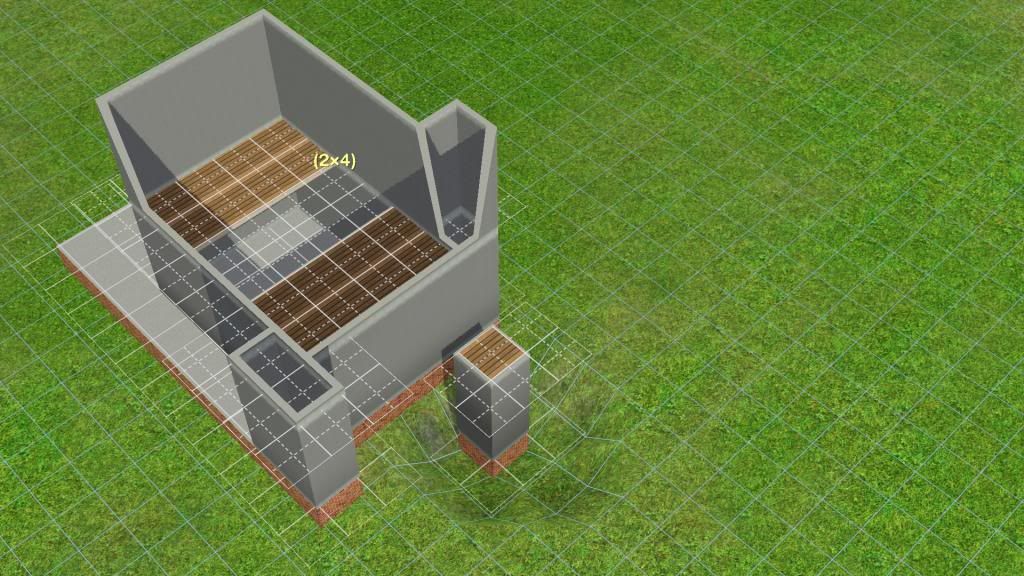
First, if you want a house with a foundation, build your foundation. If not, then move on to the next step. Under Build Mode, disable auto roofs and remove all roofs. Build a 2 x 4 room, this will be your landing.
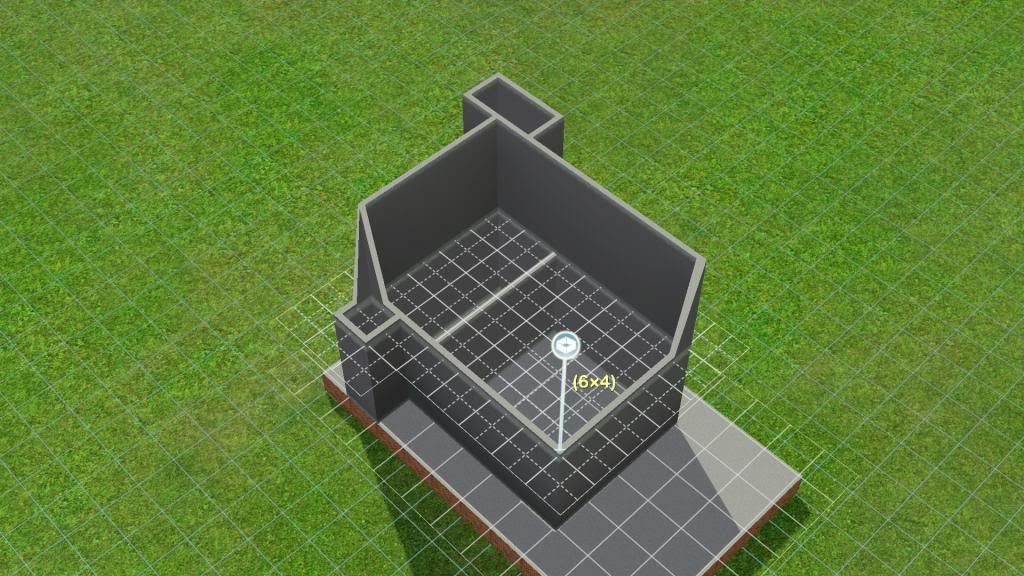
Build a 4 x 4 room in front of the room you just built, note that they share the same wall. Build a 1 x 1 room on the left corner and a 2 x 1 room on the right corner. The size of the rooms are just the minimum size requirement, you can expand them into any kind of rooms that you desire. (The latter two rooms are important to avoid any holes in your walls. If you wish to expand, please try to expand the 1 x 1 room to the west, but never even one square tile north, as this will cause holes to appear in your walls. As for the 2 x 1 room, you can expand it to the north, but you need that room to be at least one square tile north of the landing room, or else there will be holes as well.) You should come up with something resembling this.

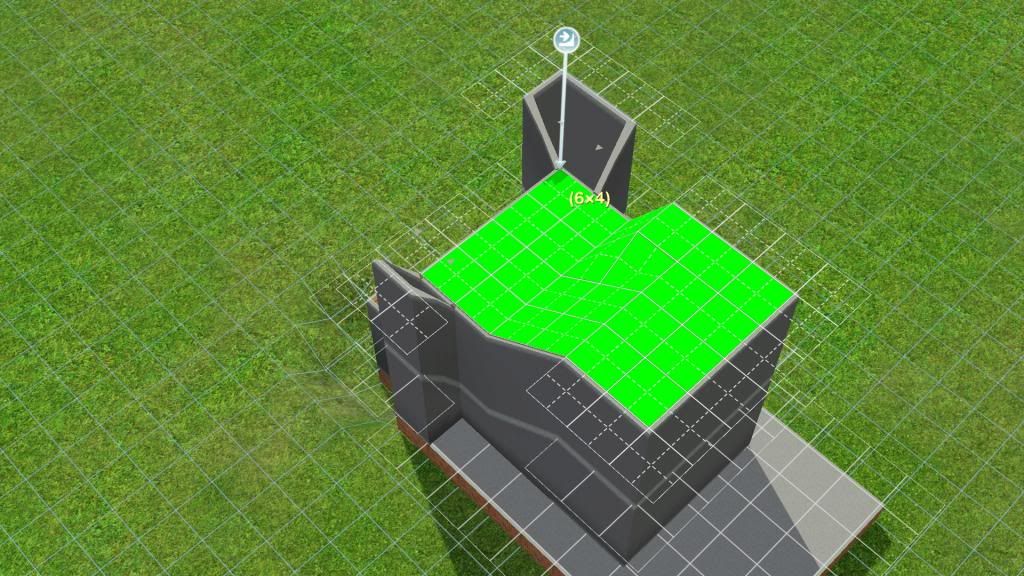
Go to the second floor and repeat the same thing, except that this time, the middle room will be just one big room, with no partition in the middle. You'll have a 6 x 4 room in the middle, like this.
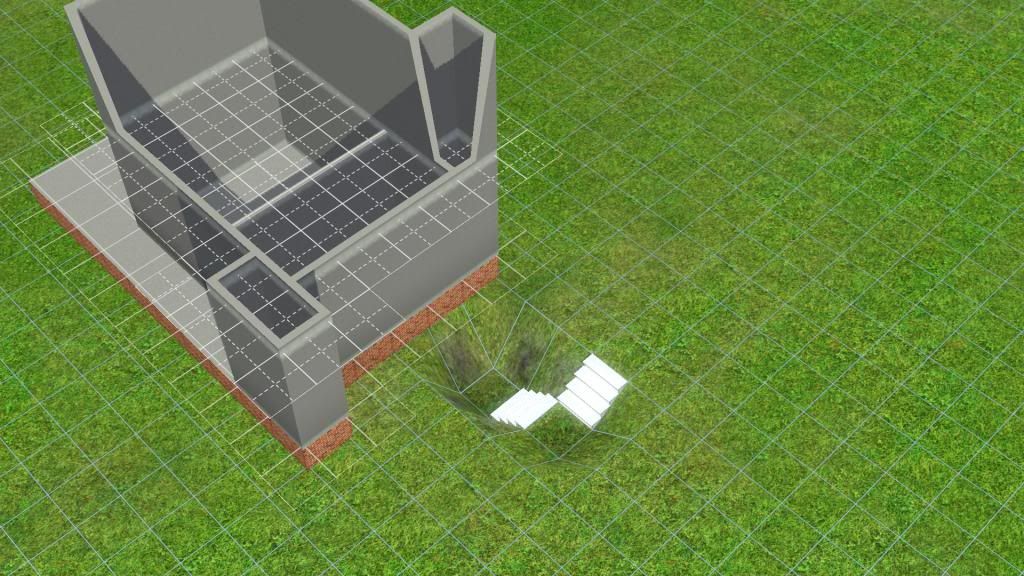
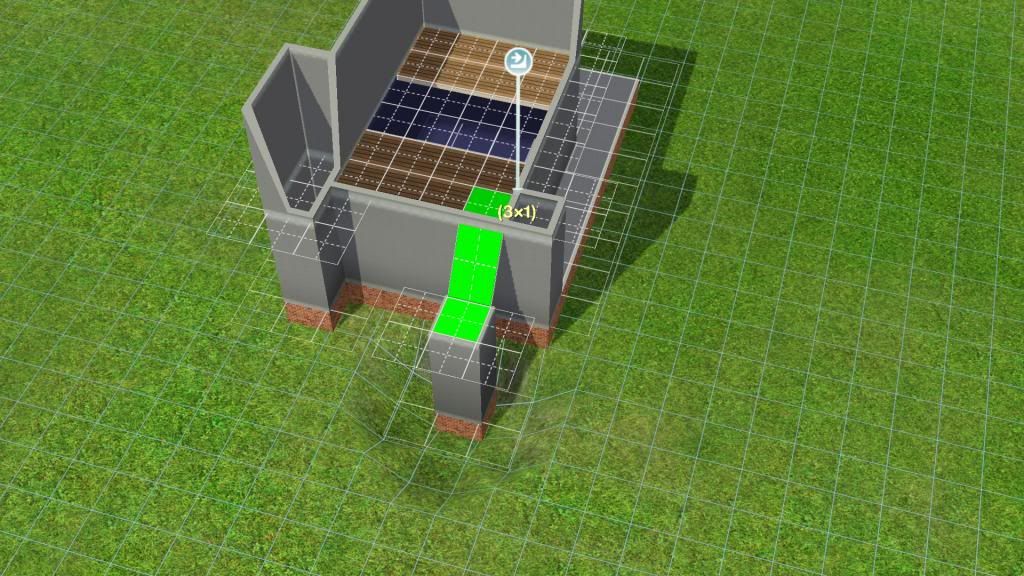
Remove the foundation, if any, next to the landing room. On the ground level, place two sets of stairs down to lower the ground. Make sure that the lowest square is aligned with one of the square tiles from the landing room.
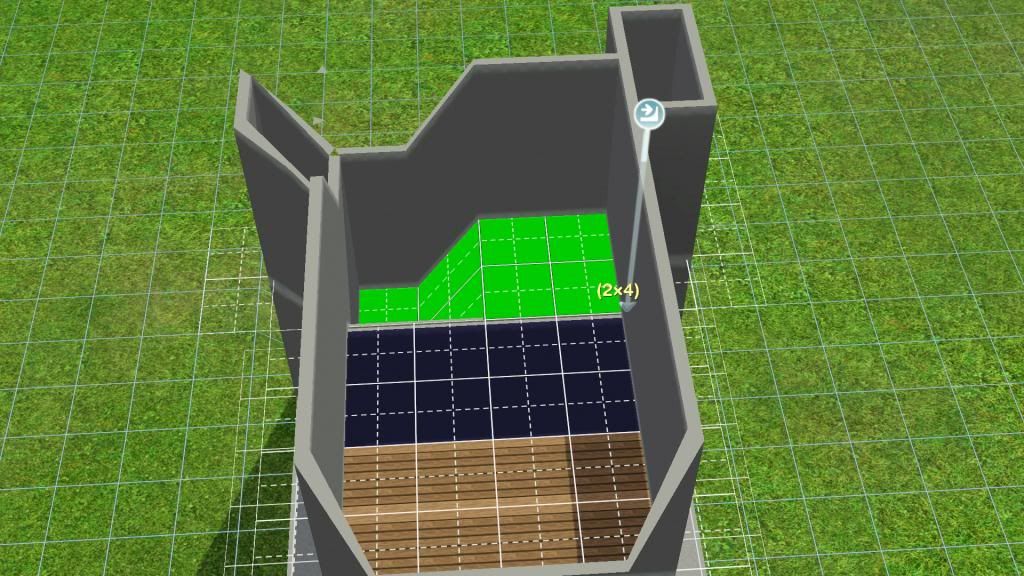
If you have been building your house on a foundation, then first place a 1 x 1 square tile of foundation on the lowest square. Then, build a 1 x 1 room on that foundation. If you haven't been building on a foundation, just build a 1 x 1 room on the lowest square. Go to the second floor and put flooring on your landing room, the 1 x 1 room you just built, and also on the section two squares away from your landing room, like this.
Now, turn on your CFE cheat by pressing ctrl + shift + c, and type "constrainfloorelevation false" without the quotation marks. Under Build Mode > Terrain Tools, select Level Terrain. Click on the top of your 1 x 1 room, where the floor tile is, and drag it to the square tile that is aligned with it in the landing room.
One of the square tiles in the landing room should now be the same height as that of the 1 x 1 room. Repeat the same step as above, but this time, start from your newly lowered square and drag it across your whole landing room, like this.
You can now add your stairs. I did it with 1 stair width at a time, and from the second floor to the landing first, as I found that I had some trouble putting the stairs from the second floor to the landing if I did the stairs from the landing to the first floor first. Before you put in your lower staircase, you might as well put in some railings on the second floor.
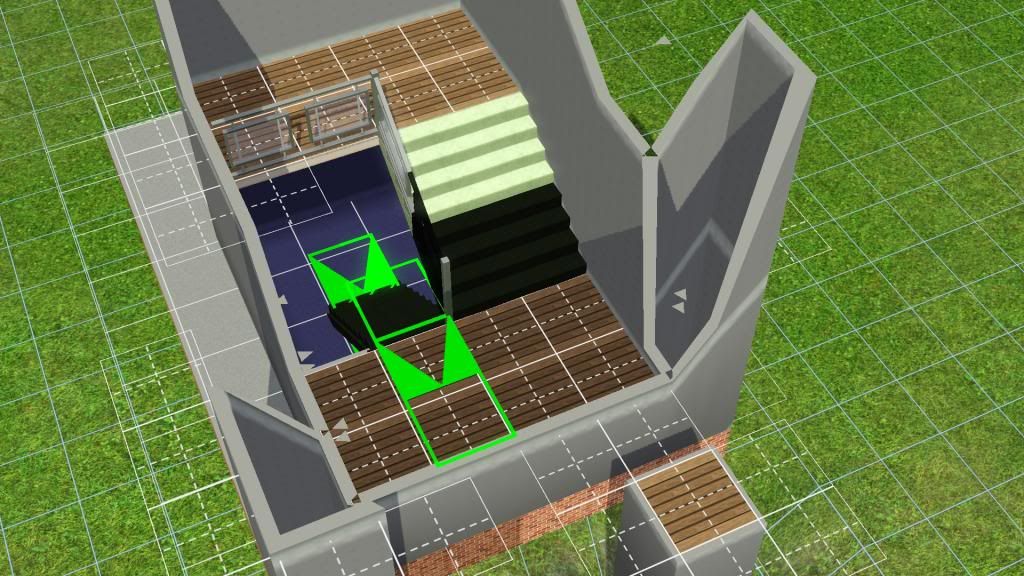
Once you're done with placing your stairs and railings, go to the uppermost floor. There, we need to straighten up the walls a bit. Use Level Terrain, click and drag your mouse from the front corner of the room to the back. You just need to do the middle room, the walls on the left room and right room should straighten up together with the middle room. Check that there are no weird angles. If everything is fine, you can now disable your CFE cheat by typing "constrainfloorelevation true". Then, you can demolish the 1 x 1 room outside of your house.
And there you have it

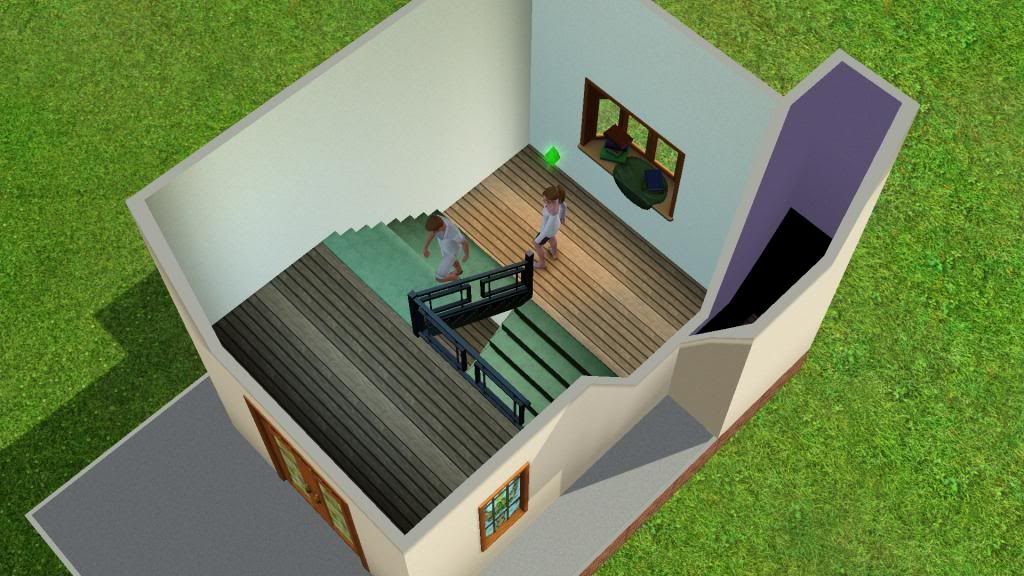
I tested it with some sims to show that the stairs work, either going up...
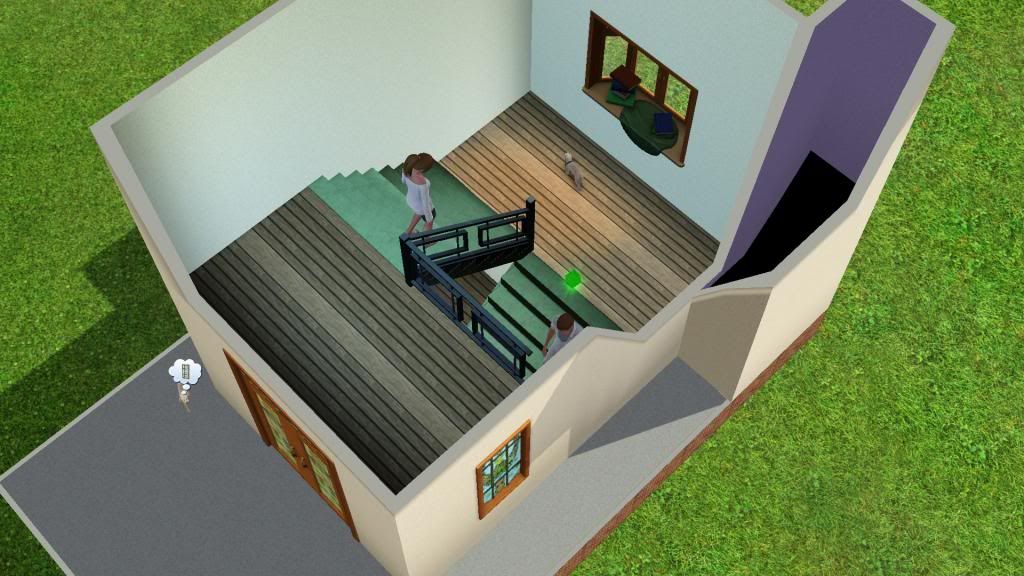
or down...
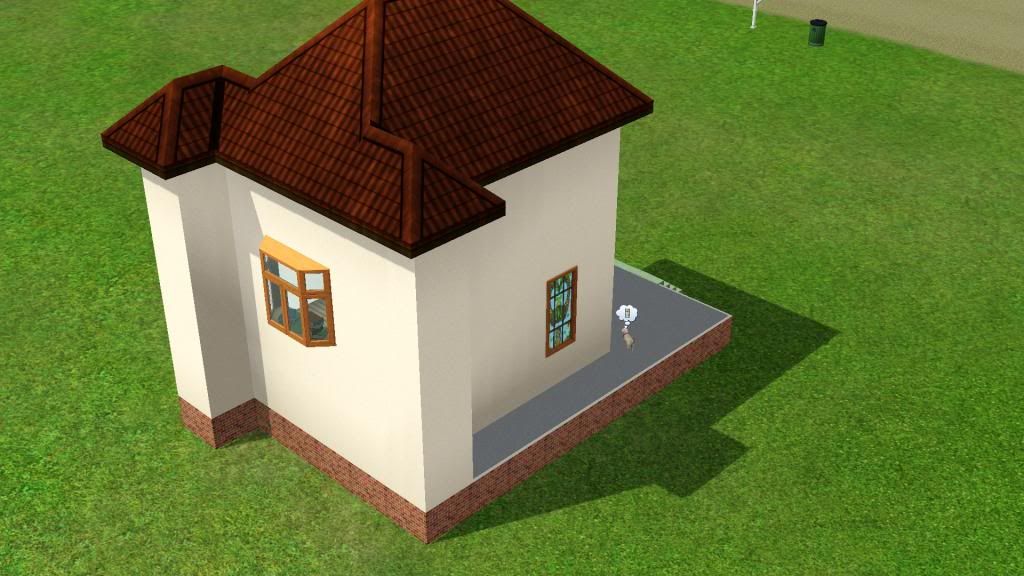
Here is a picture from the back of the house to demonstrate that there were no missing walls.
I apologize if a post similar to this has already been posted somewhere on this forum, I've tried to search for it, but nothing came up. This is actually my first post, and also one of my first few attempts at building. If I did something wrong (posted in the wrong section, wrong terms usage regarding building etc.), please let me know. Any comments or feedback would be greatly appreciated.


